This section is dedicated to businesses and enterprises that require additional resources to complete a service. An example would be an optometrist that needs specific equipment or a particular room available to be able to resume an appointment.
Advanced customization inter alia caters to multi-locations, setting up specific payment needs, or setting up virtual (video conferencing) services. If you don’t need advanced resources, you may skip to the next chapter.
Let’s go.
Add a New Resource
Resources are items that can be attached or associated with a service in which the service requires them, and if the resource limit is reached for that time slot, the service will no longer be bookable for that time.
Resources include things like:
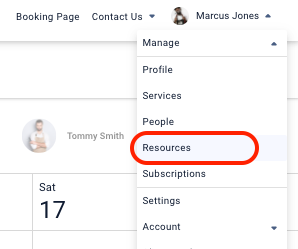
From the name drop-down bar > Select Resources
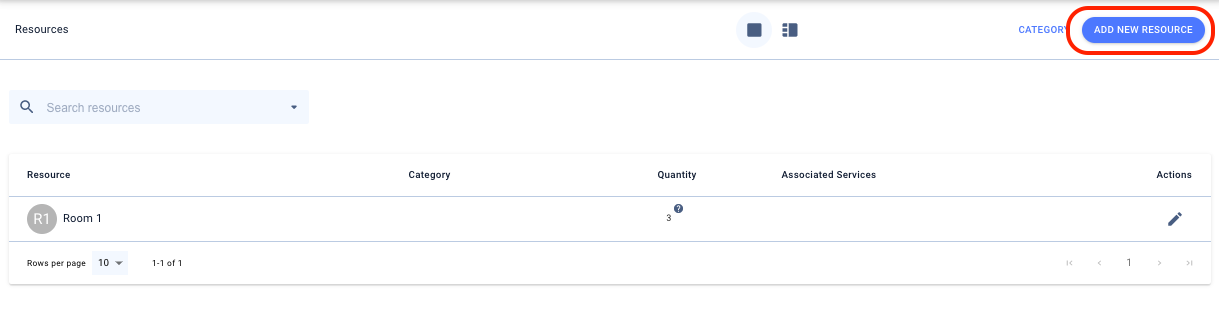
On the top right-hand side > select Add New Resource
Complete the necessary information, most importantly being the name of the resource:

Once created, you can now associate this resource to the services the business offers and the number of resources in your location(s).
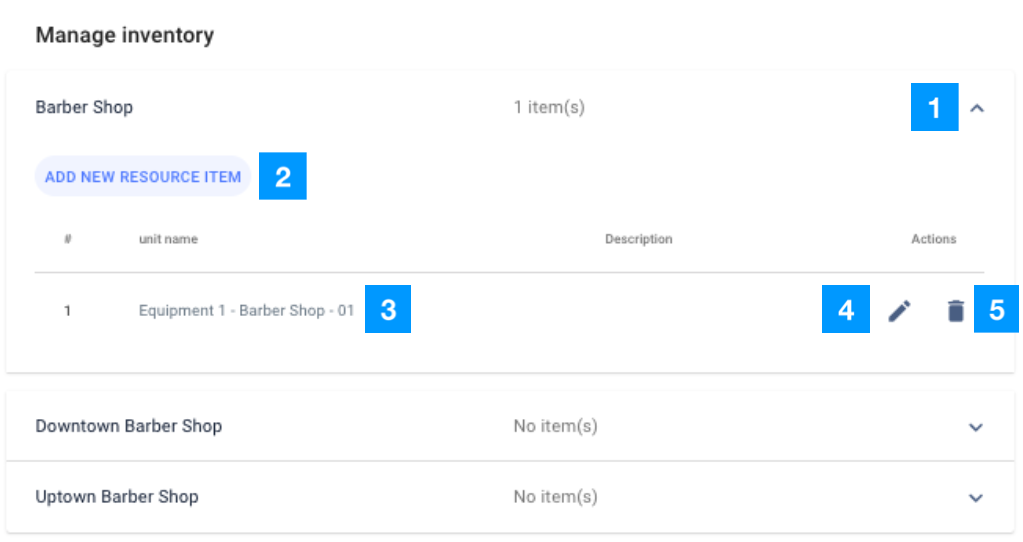
In the Edit section for the resource, you’ve added > select Manage Inventory

Once within the inventory area, can start adding in the number of resources you have in each business location(s):
💡Yocale Tip: Sometimes, it is nice to speak to a real person. Contact us to request a demo.
Associating Resources
Now that you have created the resource and set the number of resources within your business, now you can determine which resources you’ll need for which services
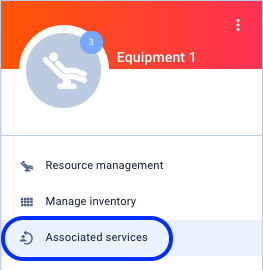
Within the Resources area,> select the resource > select Associated services
In the Associated Services area, you can select the services you want to be associated with this resource:
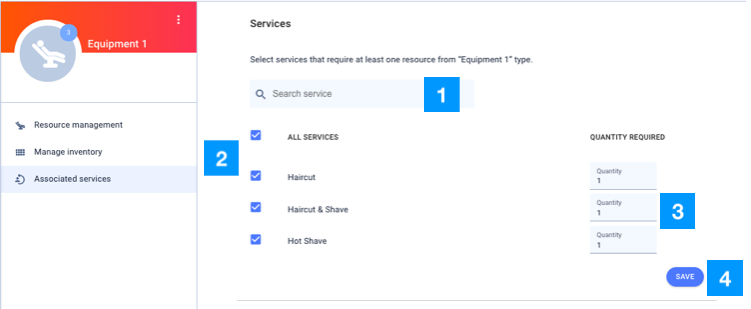
When finished select Save!
Set-up Multi-Locations
Do you operate a multi-location business? If so, navigate to the business drop-down > Manage > Locations:


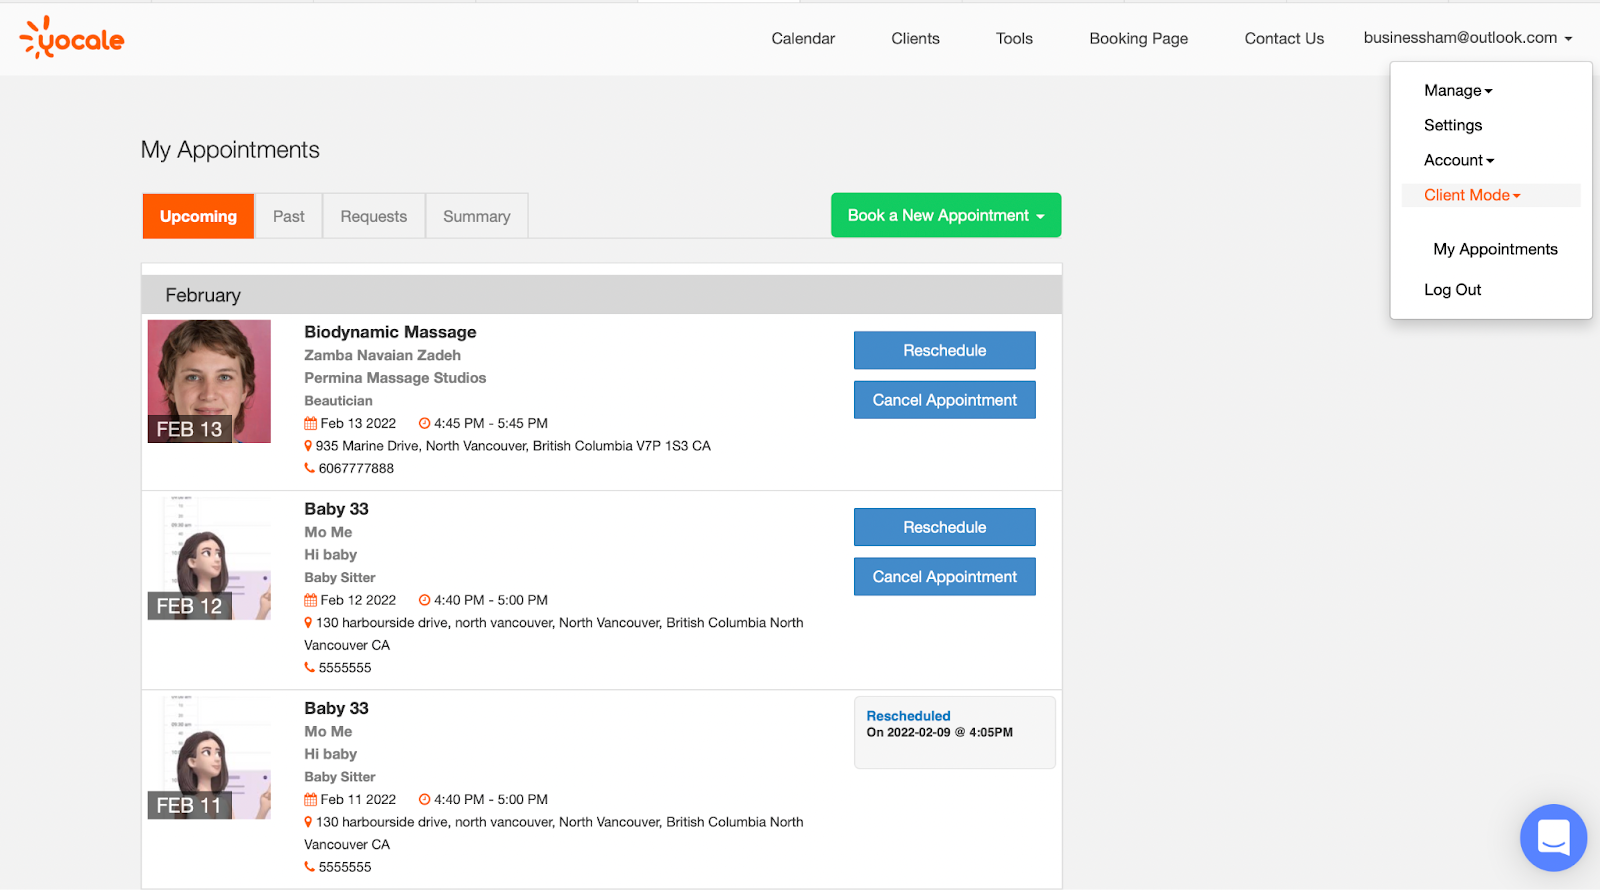
Client Mode
We illustrated all the features and opportunities for you to get bookings online, but did you know that if you book an appointment for yourself with another business on Yocale, you can view your full appointment history? Just switch to “Client Mode” from the email drop-down menu:
A Brief Introduction to Tools
Now, let’s introduce you to your “Tools” portal. To arrive here, select Tools from the toolbar and “Business Tools”.
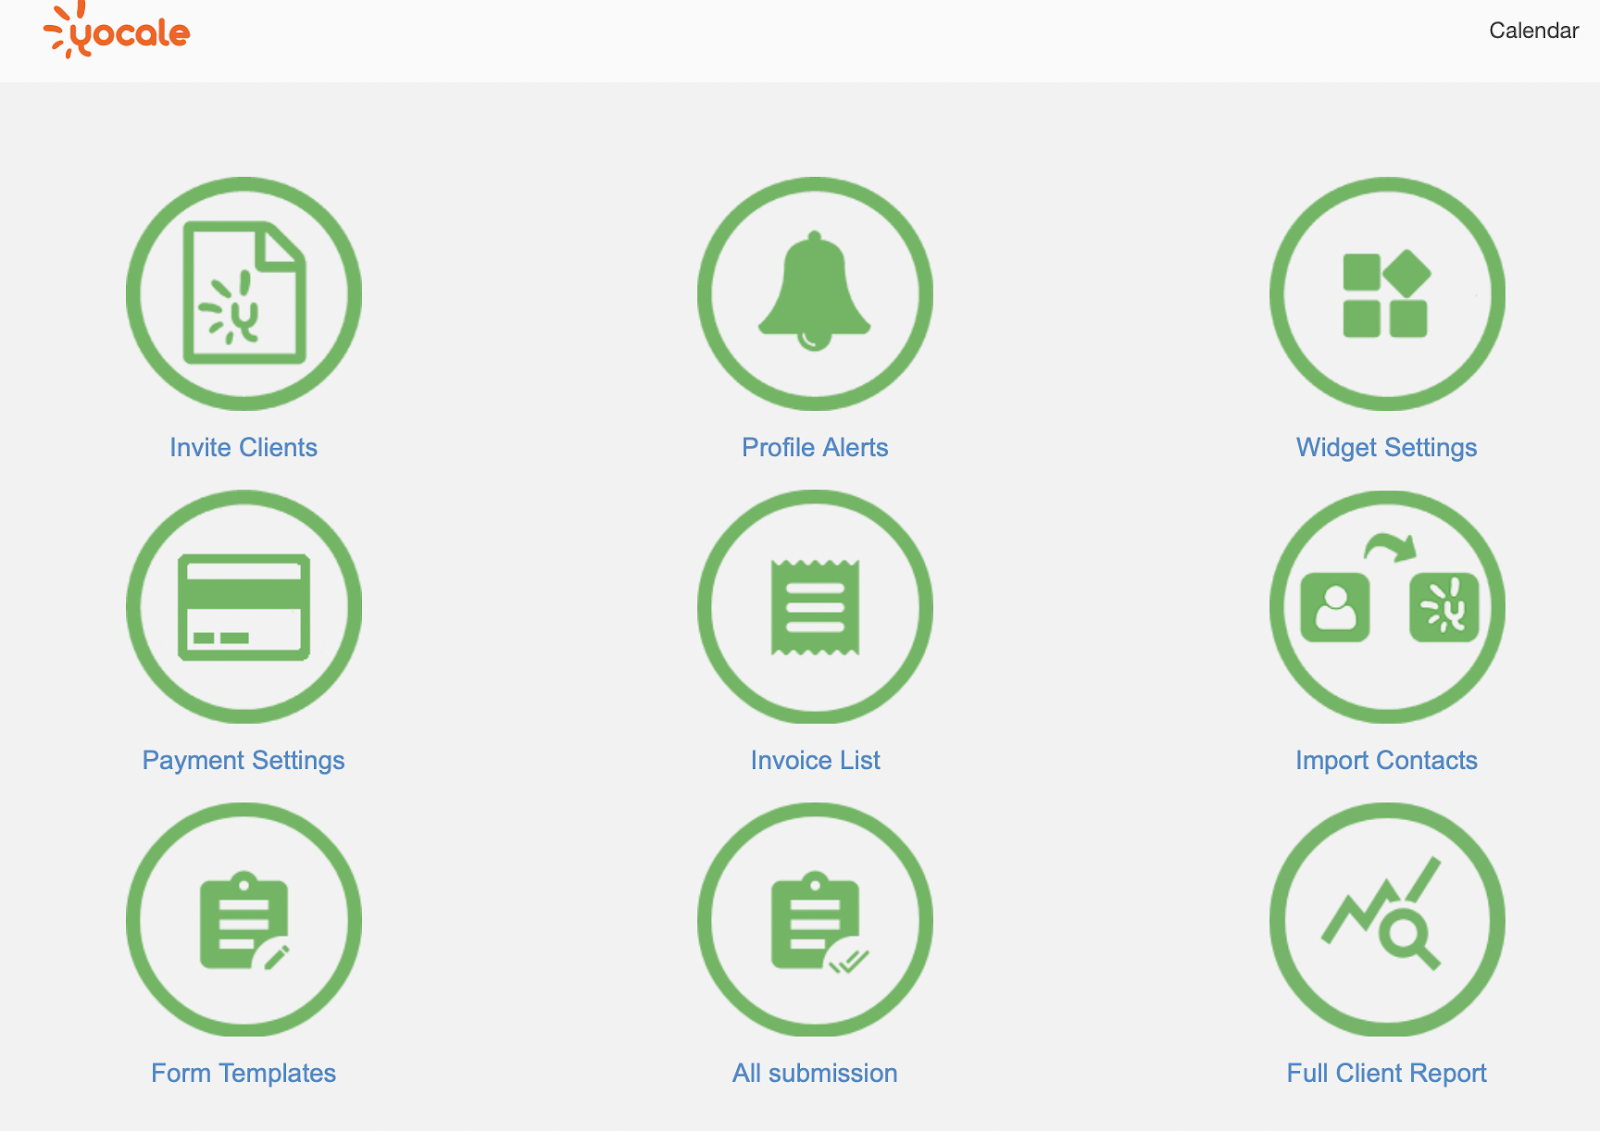
In Business Tools, you will most likely get the most usage from Forms, Widget Settings, and the Client Import. In addition, you as well have access to the following tools:
Selecting “Tools” and “Provider Tools” provides access to do the following:

Each of these tools will be discussed in more depth and relevancy to its chapter.