Simple, innovative, and free. Yocale’s super flexible scheduler makes it a breeze to set up your availability. For customers to book services online, you need to create your schedule and identify the days you are available to take appointments.
Let’s navigate the schedule together.
🎥 Guide: Step by Step Guide to Creating Your Schedule
All right. How are you doing so far? Hope you are following along just fine! If not, take a break and come back. We’ll still be here. With most things here at Yocale and to offer the utmost efficiency, there are two ways to set up your staff’s schedule. First, via your Calendar:
1. Calendar: To access the schedule through the calendar, make sure to the left of the date field, you are in Week view or Day view > select the staff you want to add a schedule for > select the blue shaded area on the staff image > Manage availability

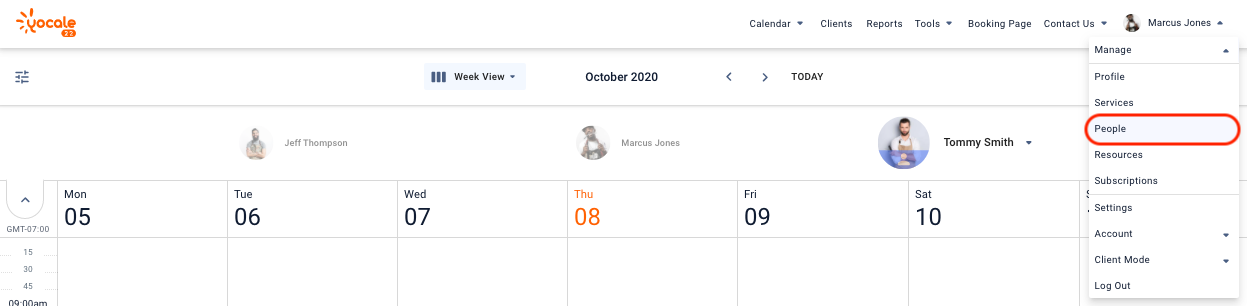
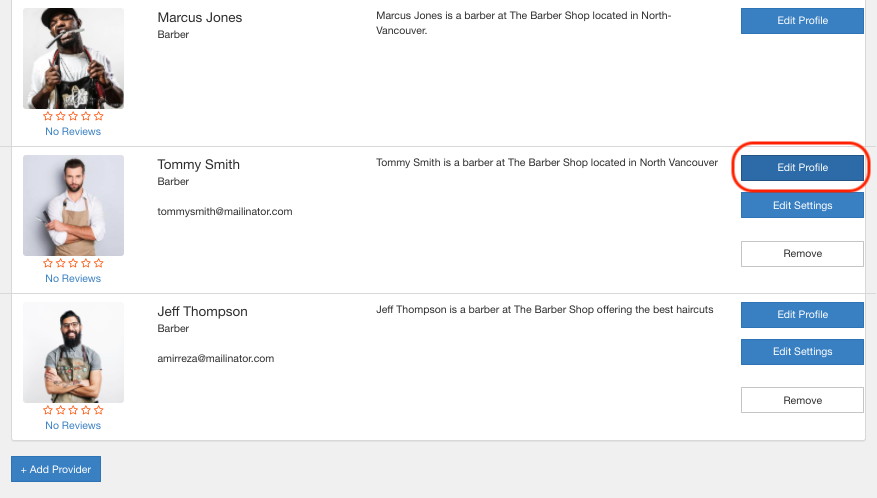
2. Via Staff Page: To access the schedule through the staff page, select the drop-down menu > Manage > People > Edit profile of the staff member you’re creating the schedule > Schedule
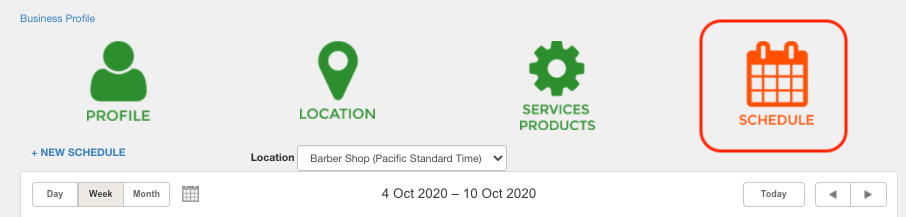
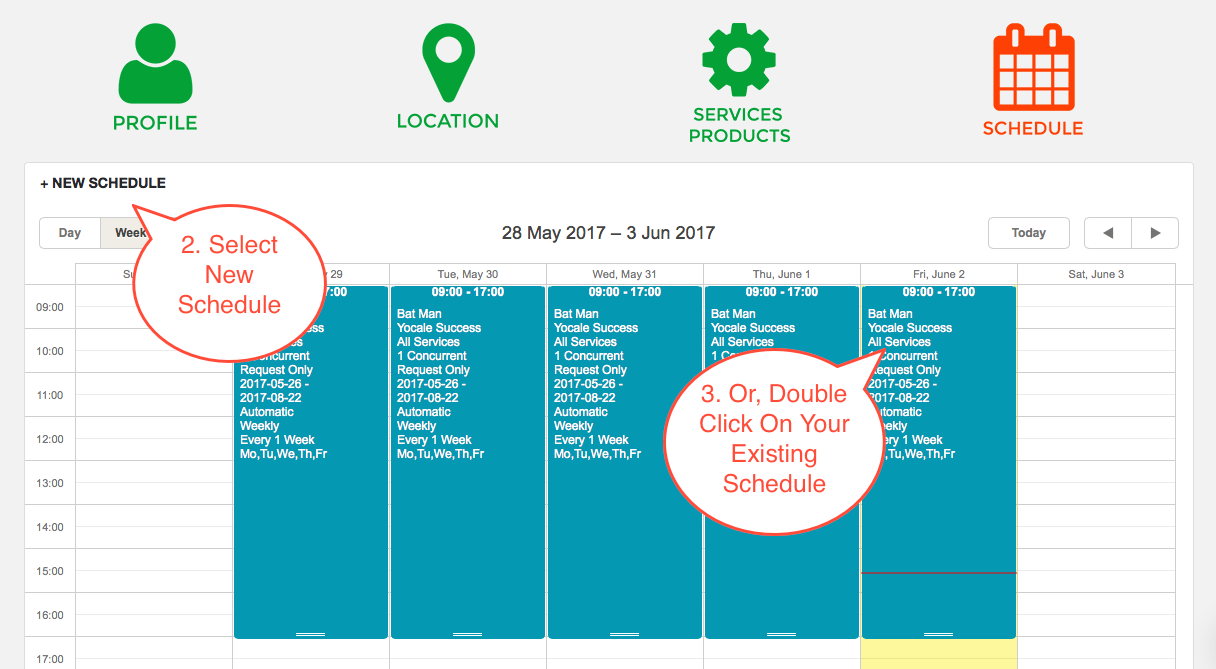
3. You can also double-click on the schedule calendar to create a new schedule. Select “New Schedule”.
4. First, begin by setting your Location (this is particularly important if you work at multiple locations and ensures clients can only book you at the location and times you are available):
5. Select the Location your services will be available.
6. Choose your settings:
- Select Instant Bookings for automatic bookings. Uncheck Instant Bookings if you would like to receive a message when a client books an appointment to Accept, Decline or Propose Another Time. Tip: Appointments won’t be put into your calendar until you accept the request.
- You can also edit the number of appointments you can take at a time under Concurrent Appointments.

7. Within the Start & End Time slots, enter the time you would like your schedule to start and the time you would like your schedule to end.
Next, select the Date Range for your schedule. (*Note: this must be within your active subscription date)
Use the Time Slots pulldown menu to select your appointment intervals. Leaving this as Automatic will show the best appointment times to your clients based on your End Time of the day and appointment length. If set to 15 mins, it will show ex. 9:15, 9:30, 9:45. Or 30 mins will show 9:00, 9:30, 10:00.
Choose your Recurrence. Is this schedule for every day of the week? Or just a few? Every other week or One Day per Month. Set your schedule for this specific series of services and hours. Select the Days of the week that you would like your schedule to apply.
8. Select your services available (for this time & location) under the Offering pulldown menu. You can as well customize your schedule to only have certain services bookable. As you recall, under “choose offering” in the above example, all services were selected. You can easily change this to “some services”. (Tip: This option is useful when you have multiple locations and not all locations offer the same services.)

Now that you’ve created your staff’s availability, their settings and preference should be personalized. Once your staff gets their invite email for Yocale, they have the autonomy to set up their own settings.
💡 Yocale Tip: As the business owner, you also have certain authority to set this up for them in advance. We will explore business and staff settings options in Chapter 2 “Settings and Policies”.
Practice Test 🏈
Which of these 5 steps are required information when you are creating a schedule:
- Step 1: Location of the schedule you’re setting (if you have multiple locations)
- Step 2: Which services are you offering to clients, is this an instant booking or a booking request? (Defaulted to instant bookings) How many concurrent appointments are you offering? (Defaulted to 1 concurrent booking)
- Step 3: Date Range of the schedule, Start & End time of the schedule
- Step 4: What type of car do you drive to your onsite appointments?
- Step 5: Recurrence of the schedule, is this a daily, weekly, or monthly recurring schedule?