We showed you the calendar method to access your clients, now let’s arrive to all things clients directly from the clients’ tab:
- Select the Clients Tab

- Use the search bar to find your client by their name, email, phone number, or client ID. Utilize the “pen” icon to plunge into the client’s profile. Tip: Conveniently, you can click on the client’s name or avatar to get into their profile:

Once within the Client Profile, you have access to the following:
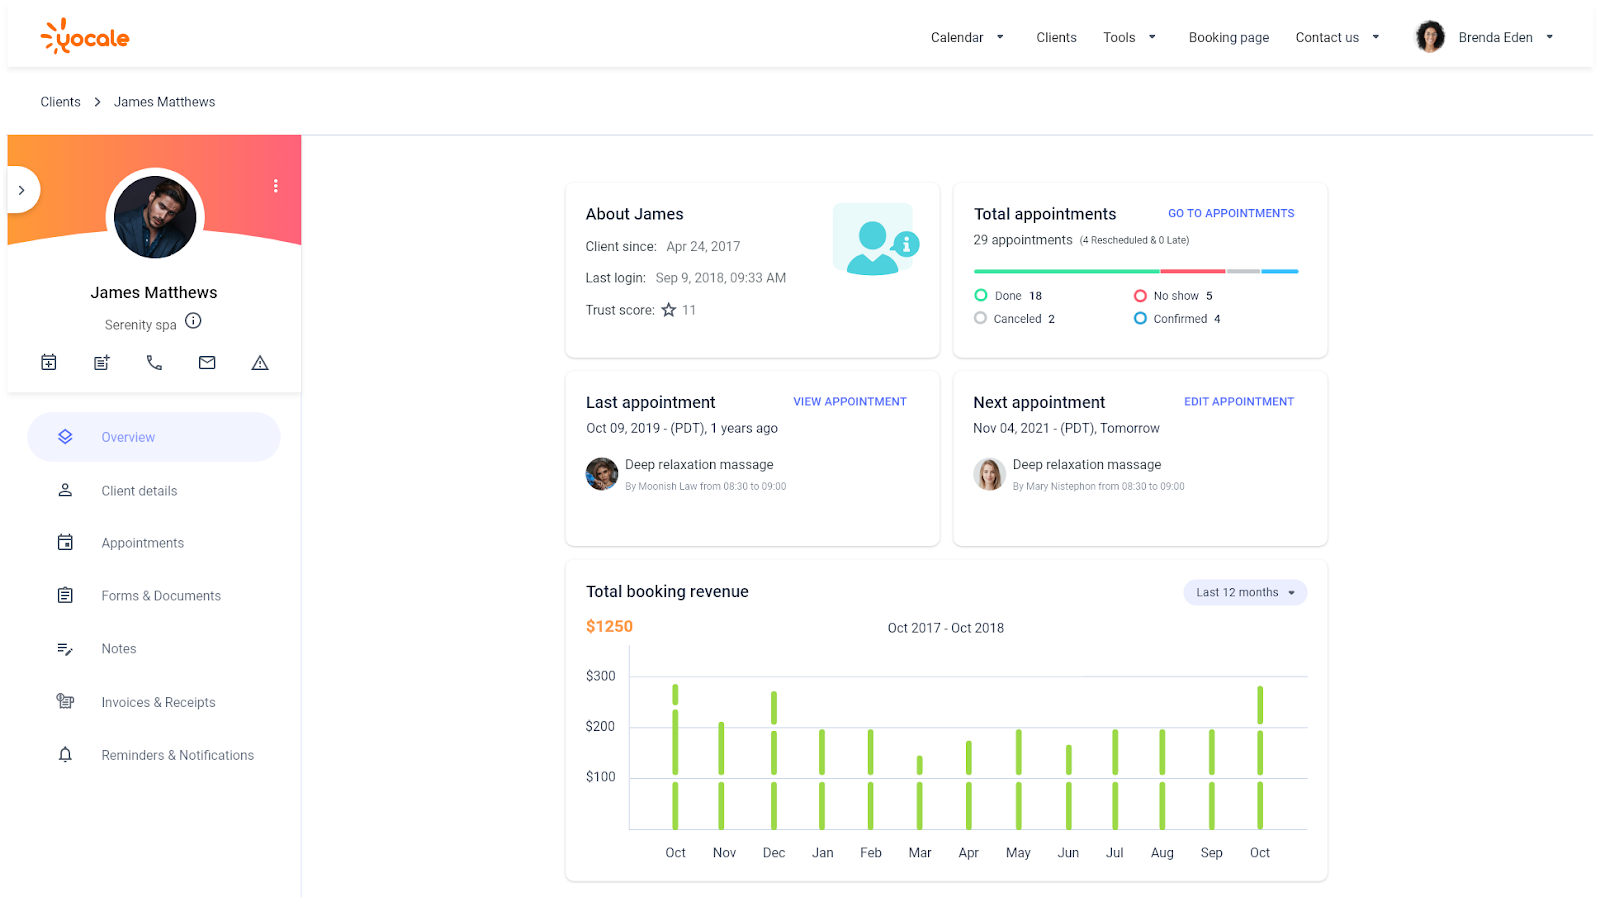
- Client Details – A quick way to grab the client’s email, phone, trust score, alerts, or client ID.
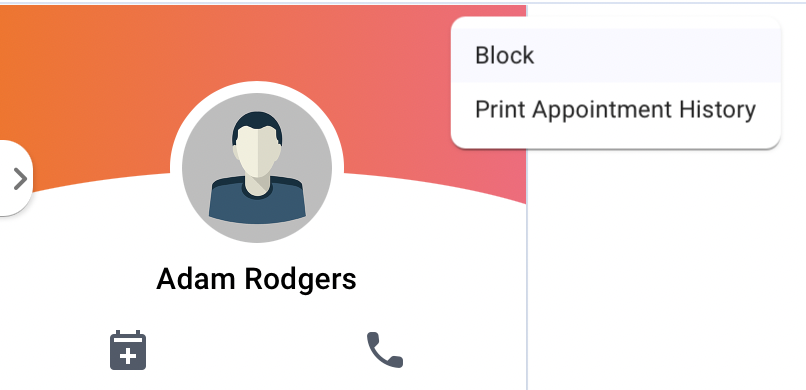
- Total Appointments- Use the “Appointment” tab to view clients’ full appointment history. For more comprehensive appointments, print the appointment history using the print button on the top right-hand side.
- Trust Score – Refer to the “Trust Score” field in the image above, can you guess what it encodes? It represents how trustworthy your customer is. When a customer successfully arrives at their appointment and you mark their appointment as done, this will affect their trust score positively. Trust scores are affected by: Writing a Review (+1), Having an appointment with a “No-show” status (-3), Having an appointment with a “Done” status: (+3).
- Next & Last Appointments – View clients’ most recent, previous, and upcoming appointments.
- Booking Revenue – Get a historical monthly revenue breakdown for the previous 6 months or 12 months.
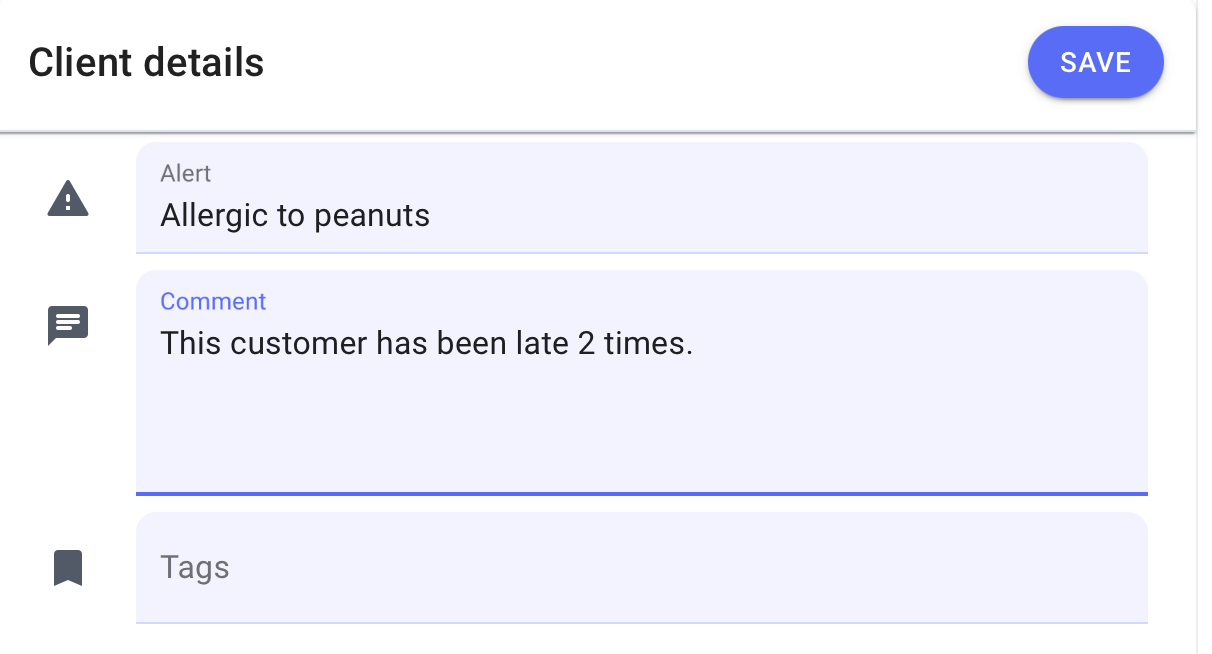
- Client Details – View, add, or edit more client details such as an address, birthday, alerts, comments, tags, account dependents, or any added custom fields. Client alerts help you enhance your customer experience by keeping your front desk (and yourself) informed of special circumstances. If you scroll downward within the “Client Details” tab, you will see a field for “Alert”. By setting up an “Alert”, you get to be notified of every single detail of a client including symptoms, special requests, or allergies. Here, you can enter the details you need to be notified about:
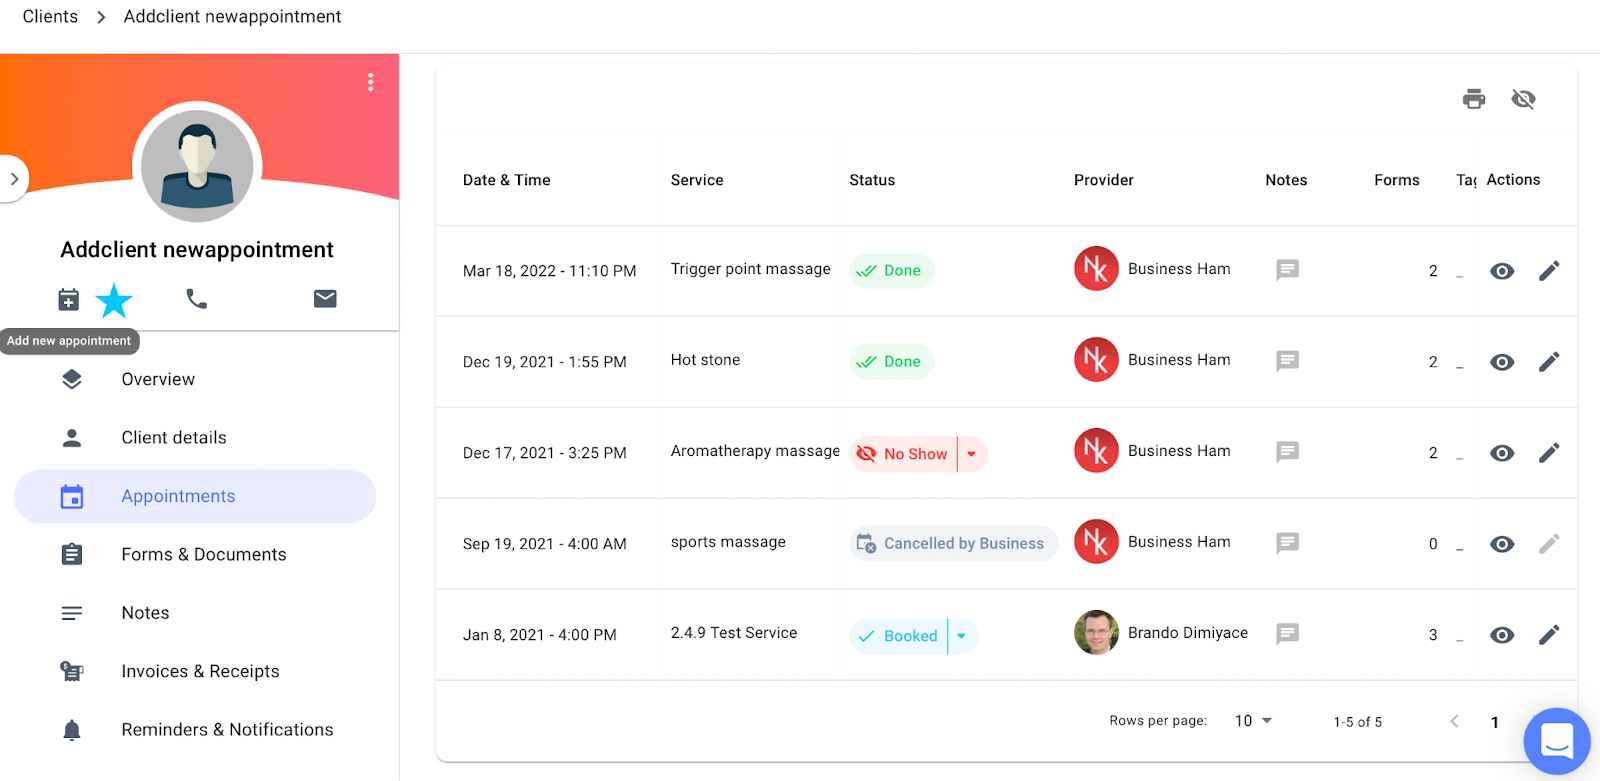
- Appointment History – Generate a detailed log of all their past appointments ( and upcoming, too). View notes, booking revenue, forms associated with the appointment, and manage the appointment status as well.
- Add a New Appointment – Directly from the client’s profile (without navigating to your calendar). Add a new appointment using the + icon (refer to the blue star):
- Notes – View client added booking comments or provider added appointment notes in the Notes section.
- Invoices & Receipts – Store all your clients’ invoices. filter based on date range, service type, product purchased, provider, or status (paid, partially paid, outstanding). Process payments through our built-in POS as well.
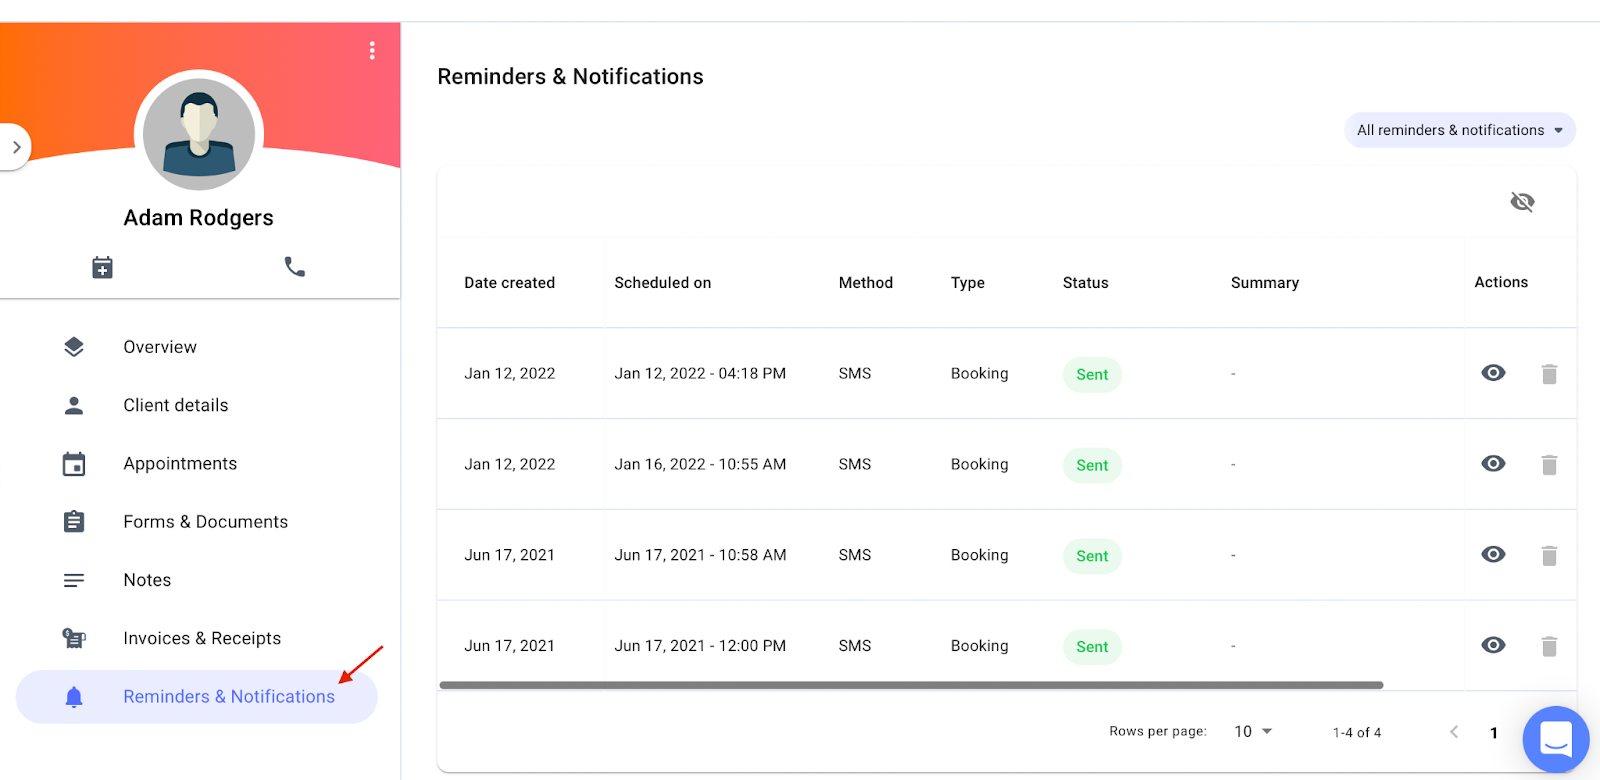
- Reminders & Notifications – Log all your client’s communication history including all email or SMS appointment reminders or booking notifications. View the exact communications sent or delete upcoming messages scheduled to be delivered. Crave more shortcut access that saves you time and effort? View all outgoing text and email notifications sent to clients! “Reminders and Notifications” are your one-stop shop for all client interactions.
📙 Yocale Tip: If a client does not want to receive appointment reminders or notifications via text, this option can be turned off. Navigate to “Client Details”, and enable text notifications off:

- Block a client – Once you are in your client’s profile, click the 3-dot button beside their photo and select “Block Client”. Blocking a client means they are unable to book with you online:
As you are scrolling through your client list, you should see the following symbol besides the name of the blocked. (Tip: unblock the click using the same method):
