Within the Form Builder, you will see a toolbar for Build, Style, and Preview. Under “Build”, you have access to a plethora of form elements for building a variety of forms. Let’s discuss each in more detail.
Design Elements
Here, you can add a video, image, text, header, divider, and spacer to make your forms beautifully functional!

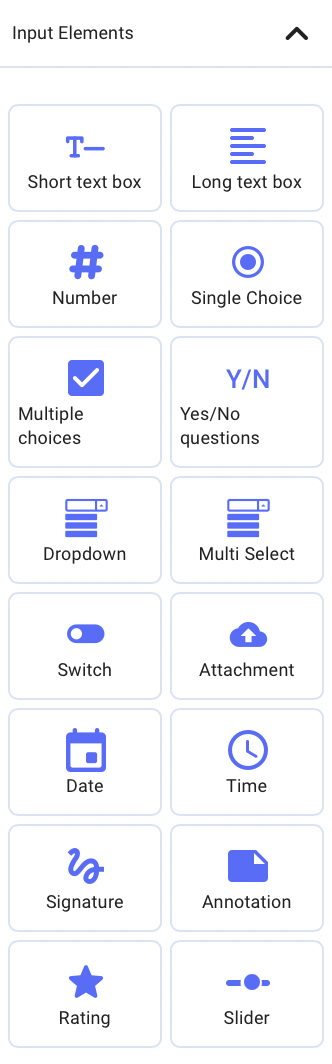
Input Elements
Within Input Elements, you can build the format and functionality of your forms. For instance, would you like to include a multiple-choice section or single questions? Long or short text answers? You can as well include a signature and attach documents in the Input Elements:
Lookup Elements
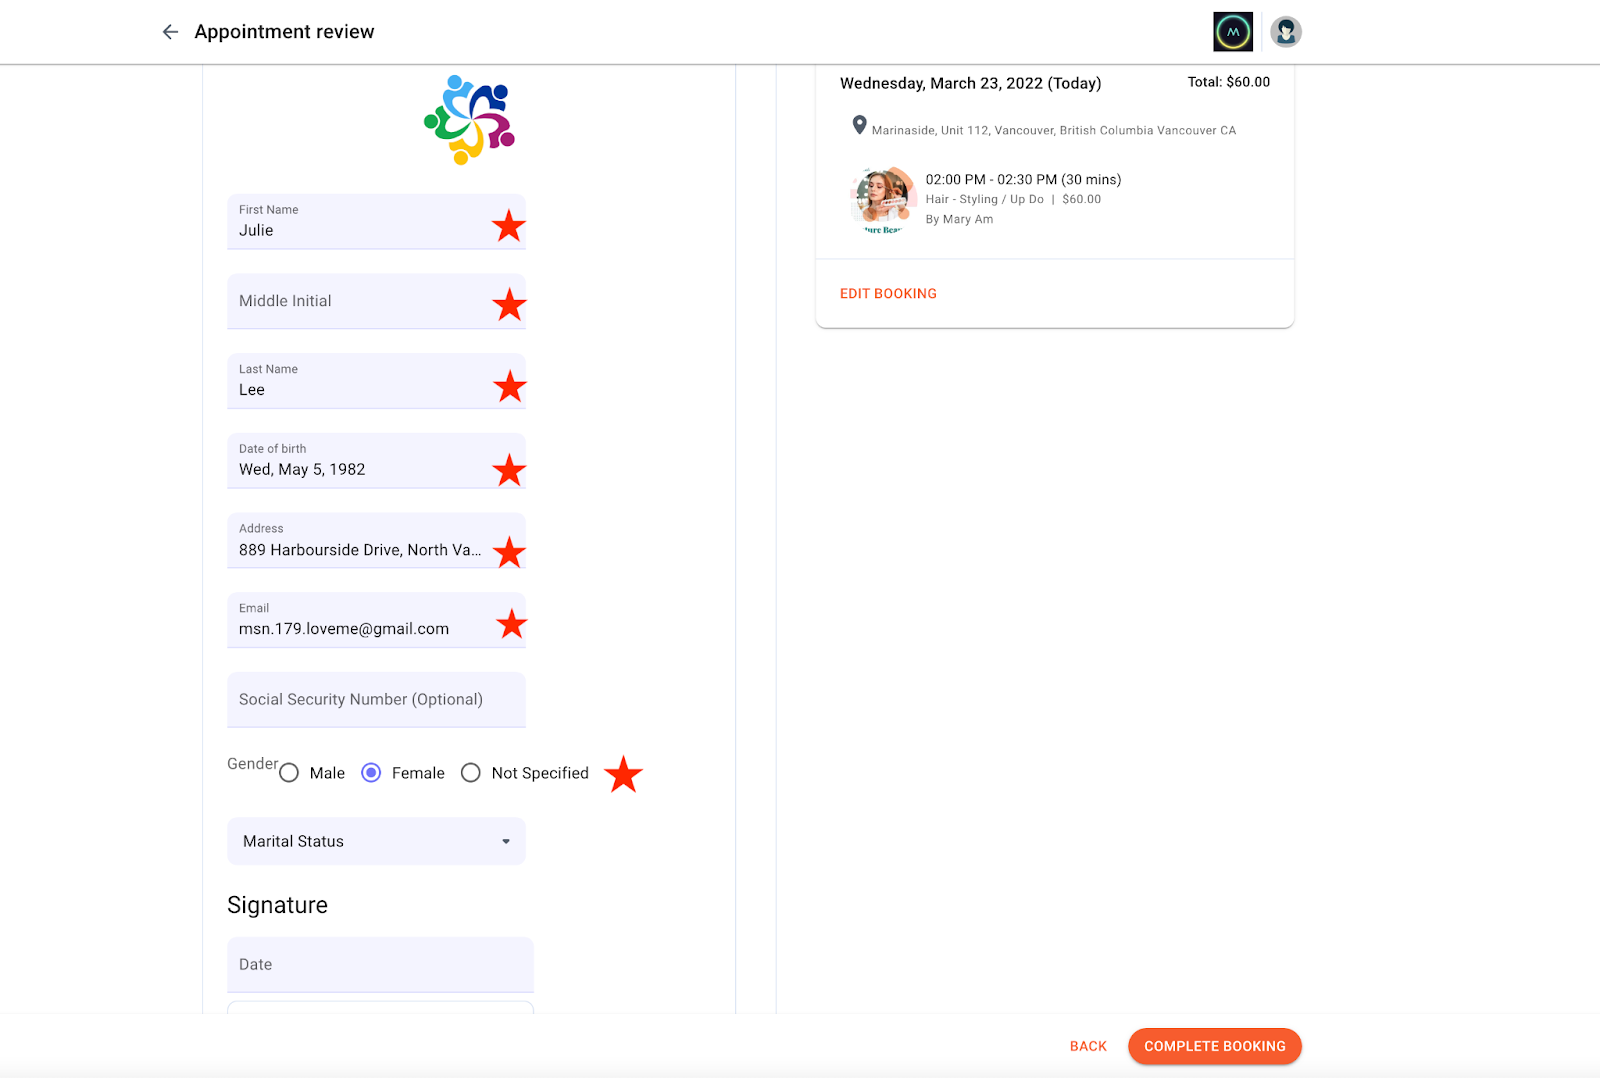
Within the lookup elements, you have the option to drag and drop fields related to the client’s preliminary information:

👨💻 Here is something extraordinary to adore. If you have saved a client’s details in the “client detail” section of their profile, the client no longer needs to fulfill the Lookout Element fields (refer to red stars in the below image for the fields). In other words, when your client is fulfilling a form, their preliminary information will be automatically populated for them:
💡Did you know? If you have a client’s outdated address, their information (in their profile) will be automatically reflected with the updated details once they fulfill the form you’ve sent them. This reflects all the fields in the lookup elements and results in precision! We love this feature.
Upload Images and Use Color-coded Annotations
Did you know you can annotate on images and or documents that you have associated with a form? If you upload an image inside annotations, you can annotate it by adding notes, pinning items, and highlighting areas! Such sophisticated tools have evolved into a popular communication tool between interdisciplinary professionals. Let’s explore it!
If you recall, in our previous practice drill, the video guide displayed how to upload an image while creating a form (either drag and drop an image or upload it from your files). As easy as it was to upload photos, it is as easy to remove them. In the area you built your forms, you will see the “Annotations” field and under it, you will see a 3-dot icon. Once you navigate on it, the following actions are available:
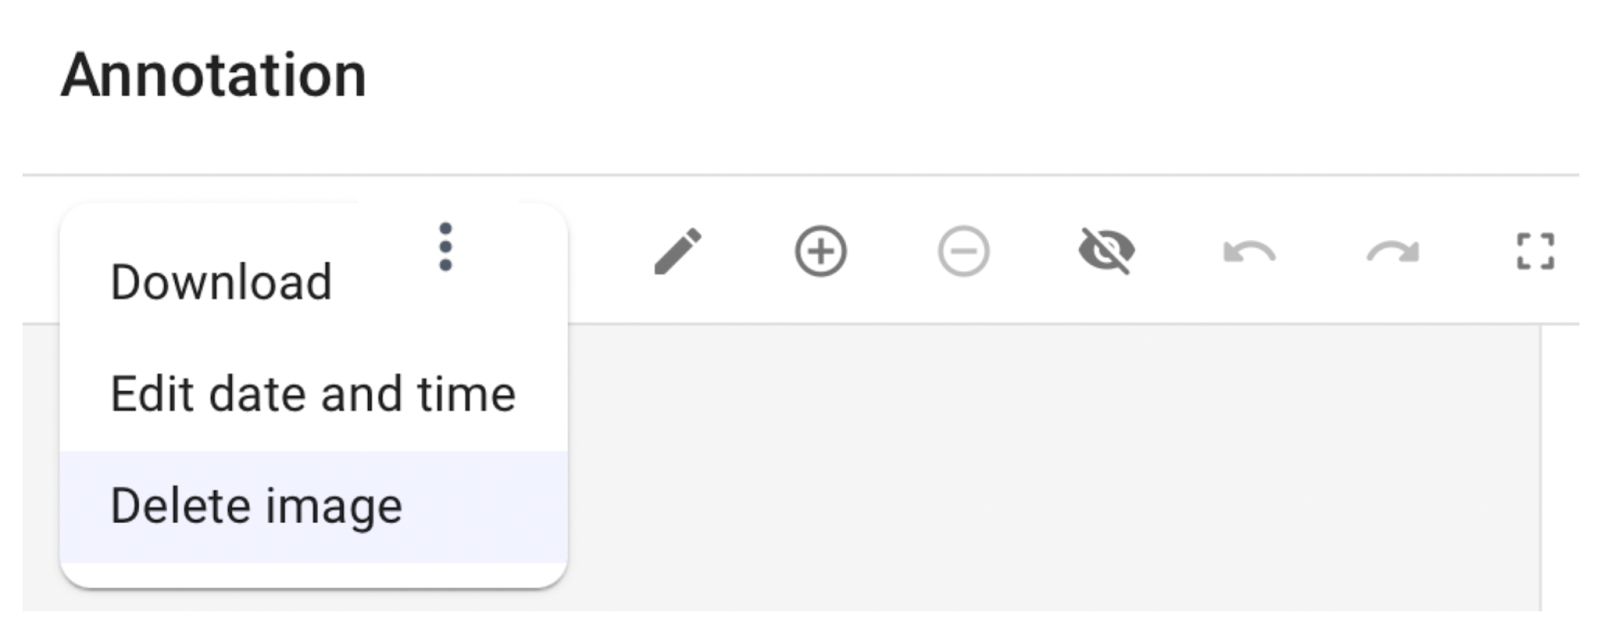
Here, you will as well see all the tools available to you for annotations!
🎥 Video Guide: Refer to this video to see Annotations in action!