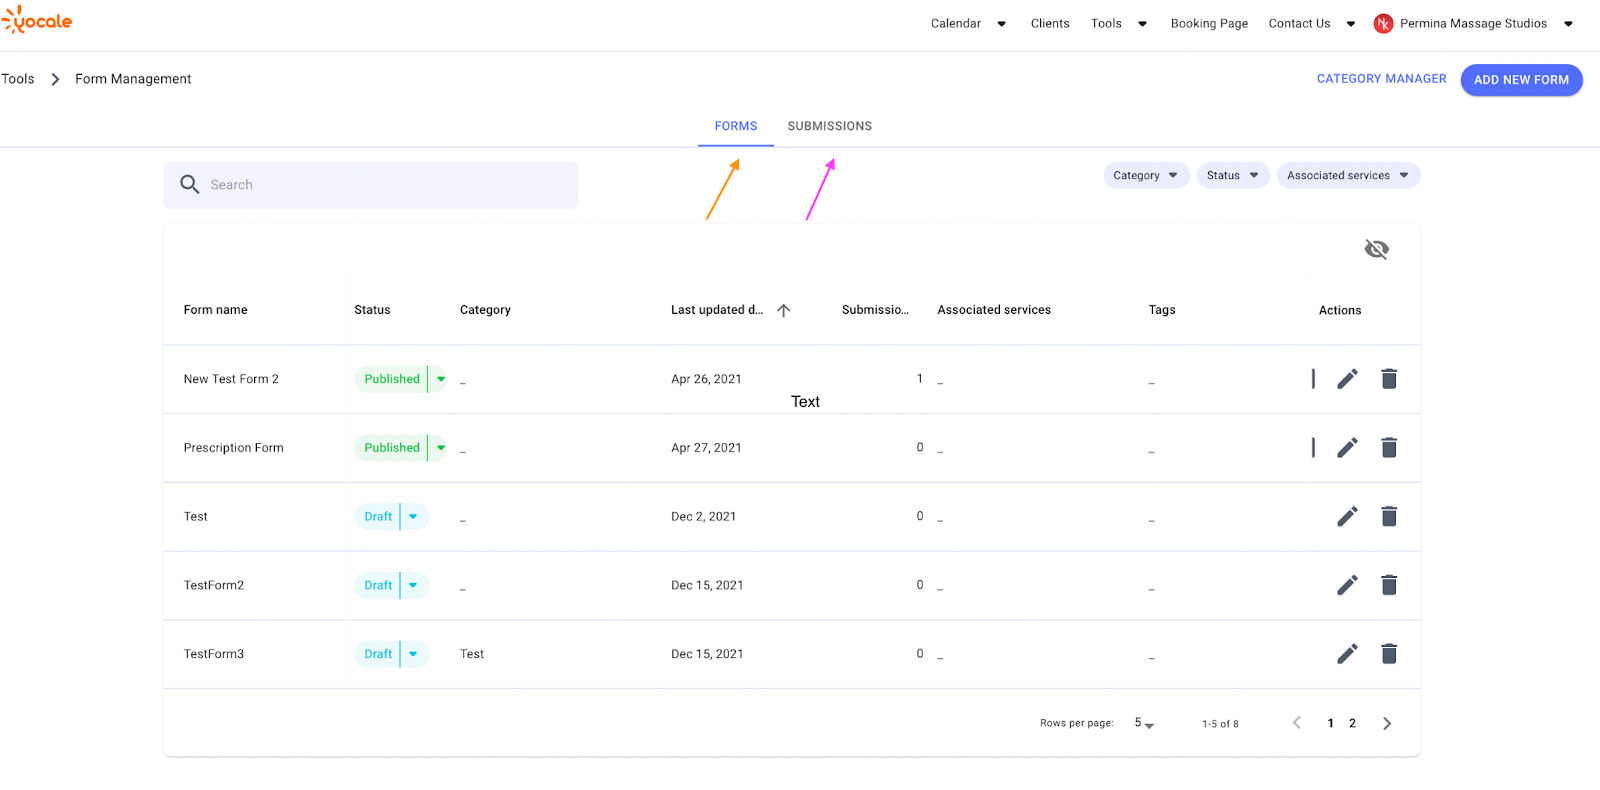
Now that we have a better understanding of the revolutionary Form Builder, let’s tour around and explore the form page in more depth. Once you arrive within the Forms Management Portal (Tools -> Forms), you will see the Forms and Submissions tab.
Let’s explore each in more depth.
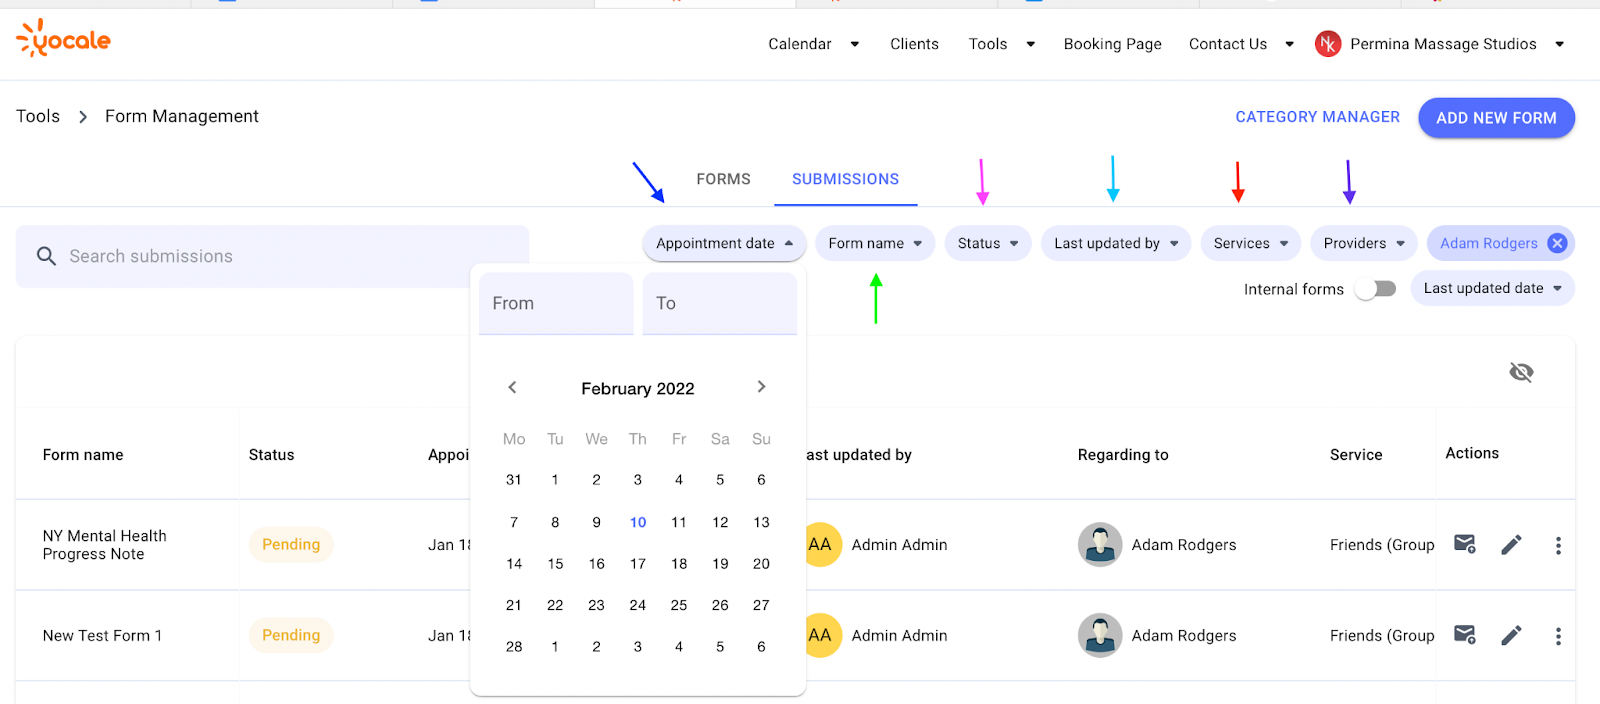
The Submission portal is where you can view all the submissions. First, say a client has not fully completed a form as you needed them to, so you need to follow up with them. Using the envelope icon illustrated in this image (refer to red arrow) you can use it to send a quick email reminder to your client:

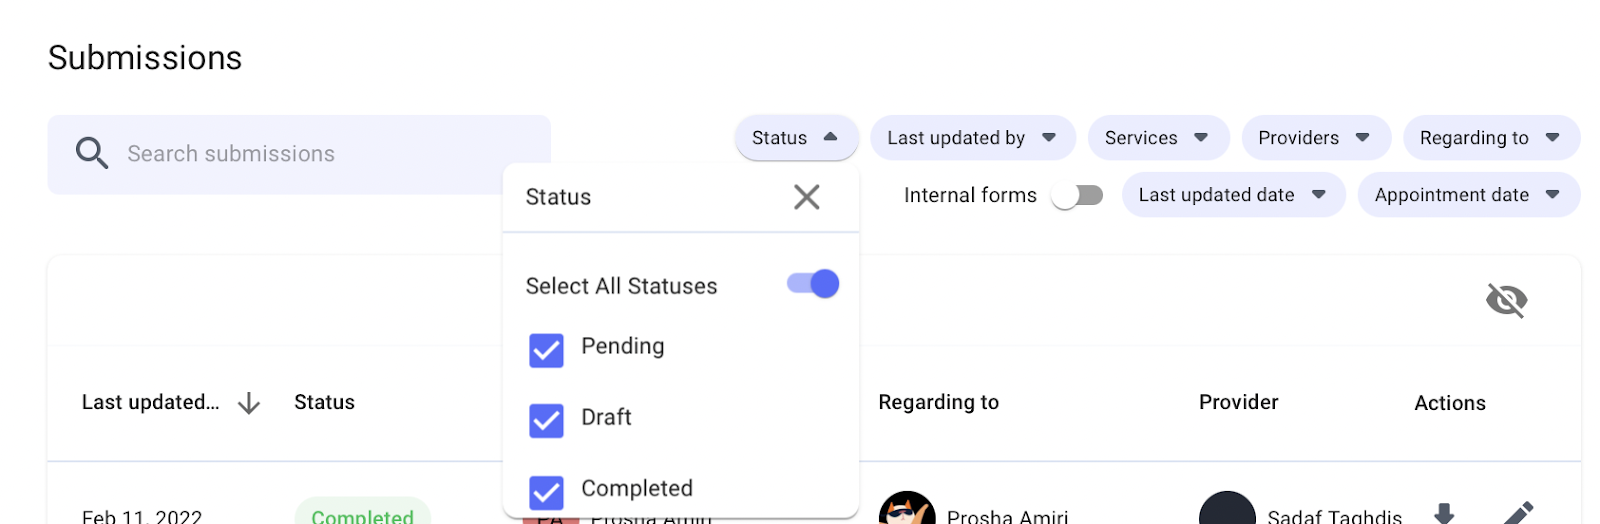
In the same image as above, there is a blue arrow pointing to the 3-dot icon. Clicking on it will give you the option to remove the form or change to Kiosk mode (described later in this chapter). By clicking on the “pen” icon or any form under the field “Form Name”, will allow you to edit the submission. In addition, you can either “Save as a Draft”, or “Submit” the submission. If you have a lot of clients and each client has a couple of submissions, it can get overwhelming, fast. But with Yocale, you can locate any submission you need with a quick search or filter the list using different parameters available to you (outlined below with arrows):
Clicking on a submission’s name will take you directly to its management section: