Once within the “Payment” interface, you can manage and execute plenty of options! Let’s review each point as outlined in the image below:
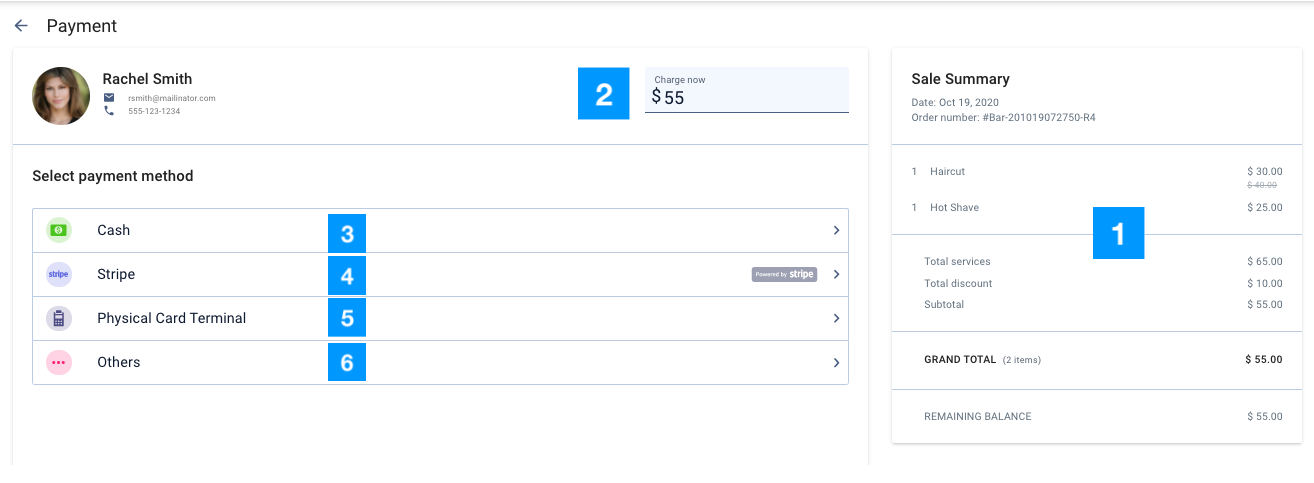
- On the right-hand side, you can verify the invoice details are correct.
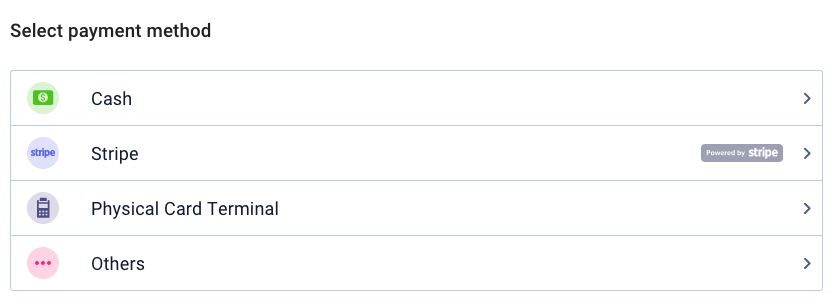
- You can process a payment using different methods. If you are doing a split payment, you can select the amount you want to charge in the Charge Now box with one payment method and then process the rest with another. Or you can leave the amount and process the whole payment at once.
- There are 4 payment method tracking options – the first one is Cash. with cash, you can select the amount of cash received and give change appropriately.
- Yocale Pay payments allow you to process payments and receive these payments to your linked bank account.
- Physical Card Terminal allows you to select from the most popular card payments so you can keep records of your various Visa, Debit, Mastercard, Amex, etc. payments and charge them through your own existing card terminal.

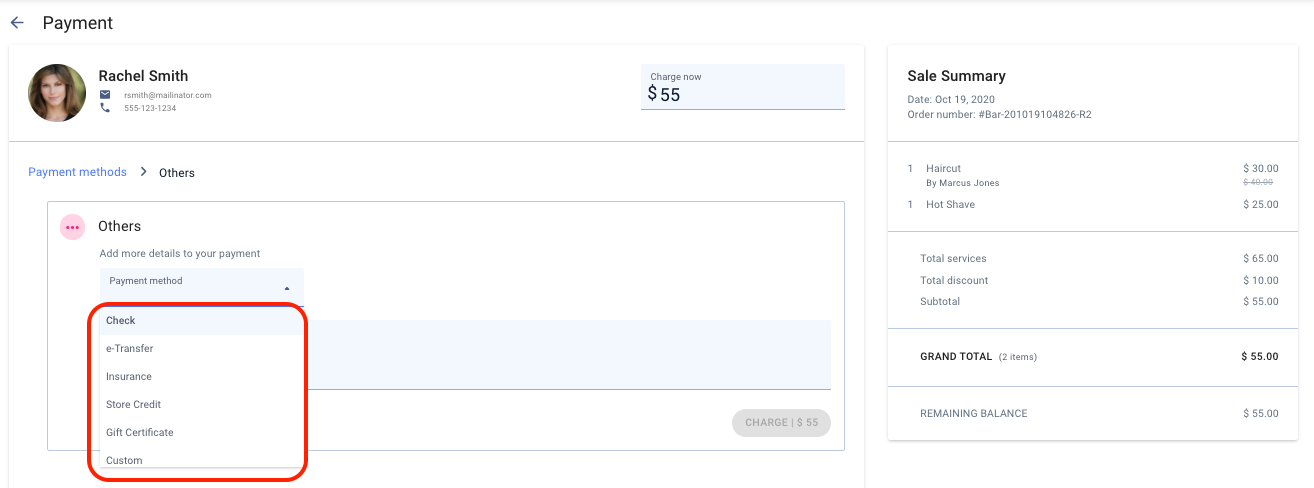
- Others allow you to select from pre-existing payment types such as e-transfer, cheque, gift card, store credit, insurance or you can create your own payment type to keep records of these other received payment types. If you are tracking a payment for anything other than cash, Yocale Pay, or your physical card terminal, you can select the other option from the list.
Here you can select from a list of options including, e-transfer, insurance, store credit, gift card, or custom where you can enter your own form of payment to track > Once selected, you can add an optional note if you like select charge to track this payment.
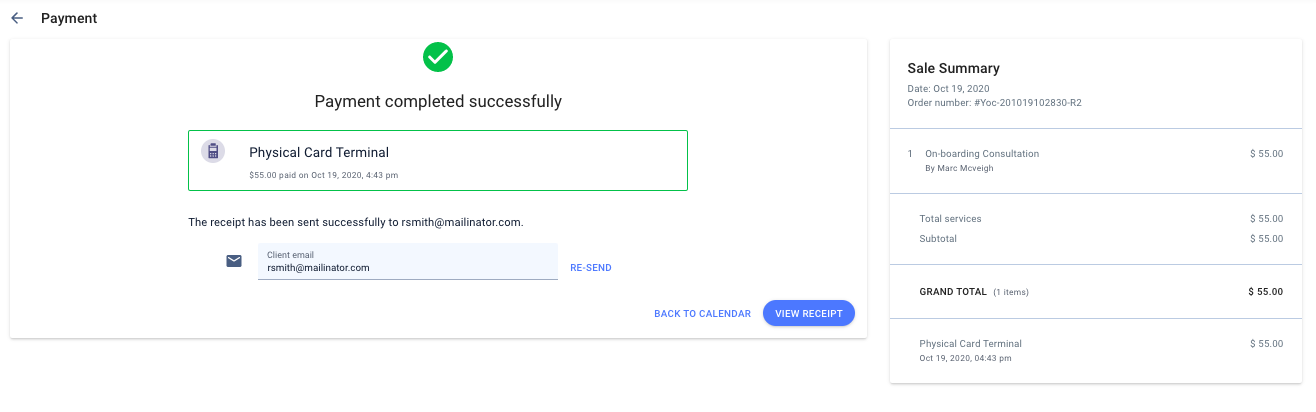
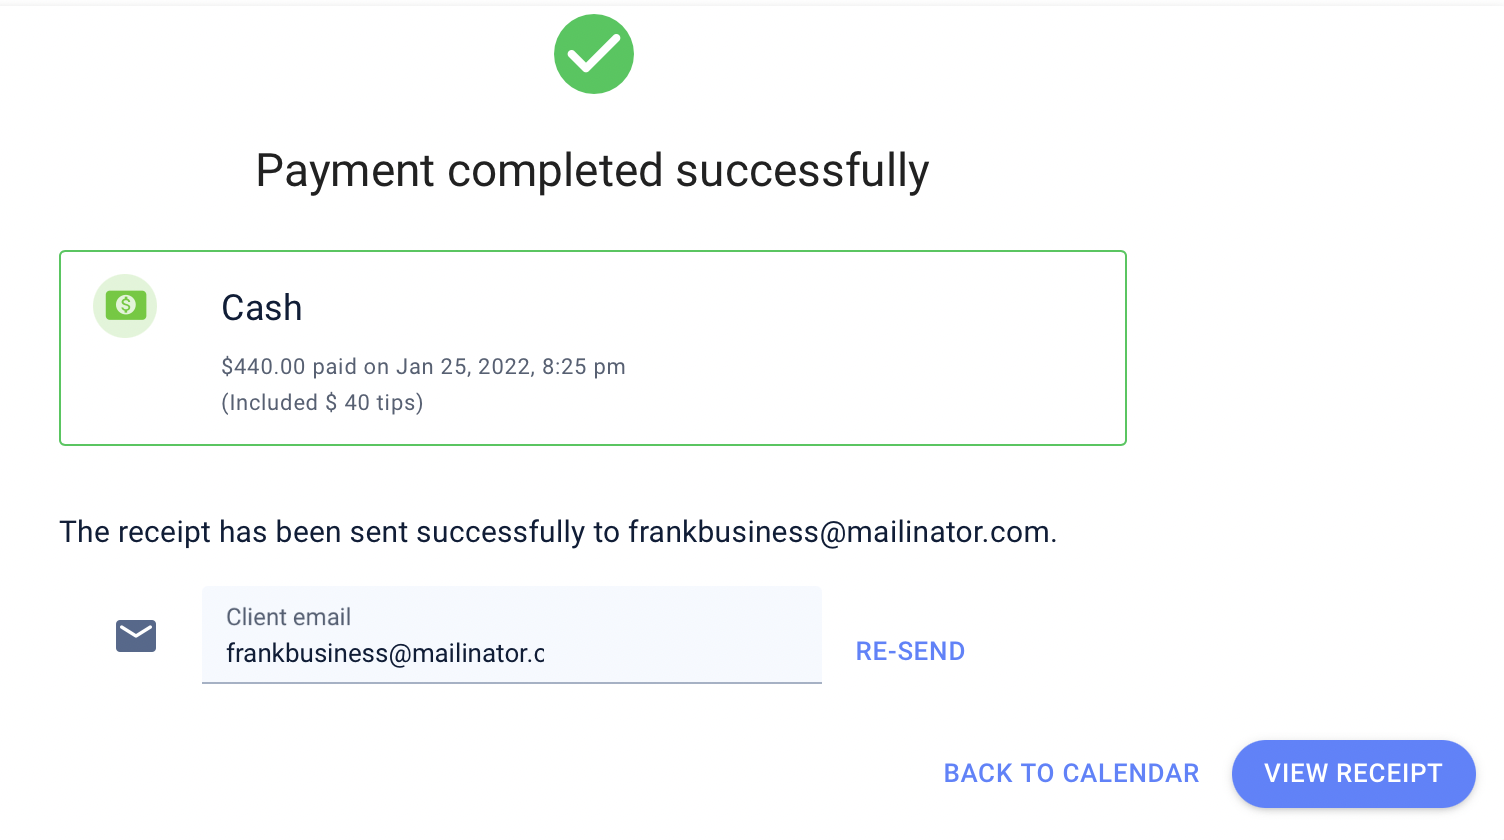
For all payment methods, once completed, you will be taken to a completed payment confirmation page which you can either send via email (by default the settings will automatically send the receipt), or you can view and print off the invoice.
Add Products During Checkout
Improve your sales strategy by adding products upon checking out your clients.
** For assistance adding your products to your account, please send a support email to support@Yocale.com *
To add your product(s) to an appointment, enter the POS invoice creator. This can be done by either changing the appointment Status to Done > Go to invoice by selecting the POS icon:

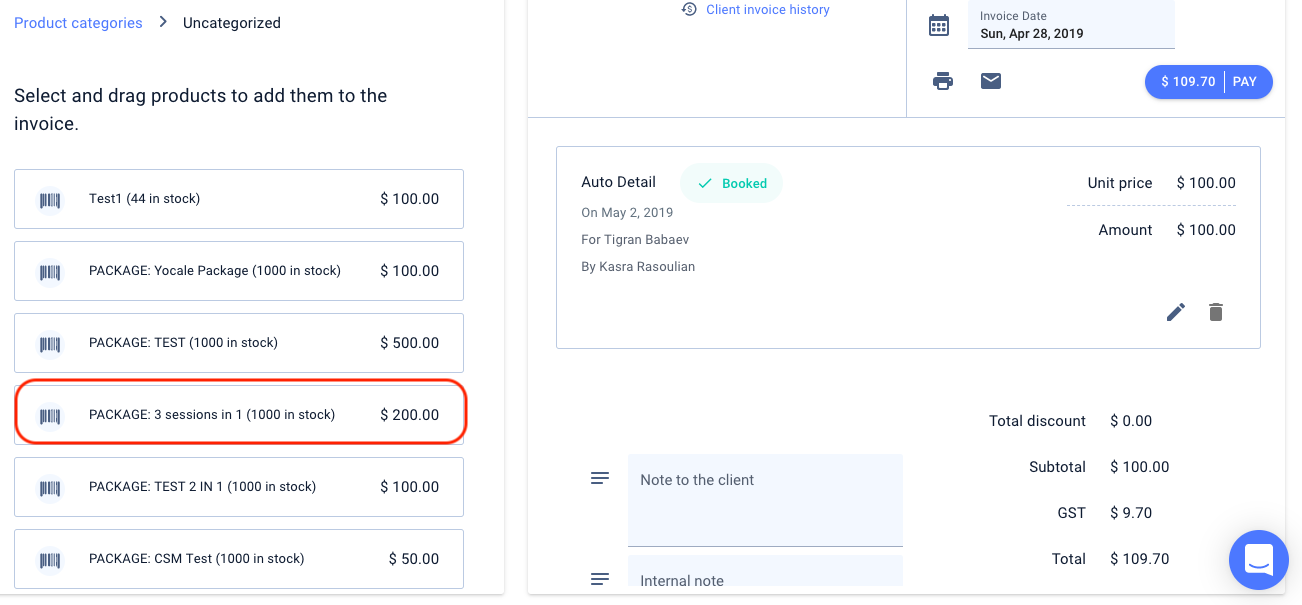
2. Now in the invoice creator, select the Products tab

3. Select the product you want to be added to the invoice and either drag it into the invoice on the right-hand side or double-click the item.
4. This item is now added to the invoice. You can either edit the quantity of this product in your invoice or edit the item with the pencil icon where you can edit the price, add discounts or extra charges, disable/enable taxes, and more
5. When finished, select the Pay button, and complete the invoice with the preferred payment:
From here, you can directly email the receipt to your client:
🎥 Video Guide: See it in action!